Google 登入 設定教學
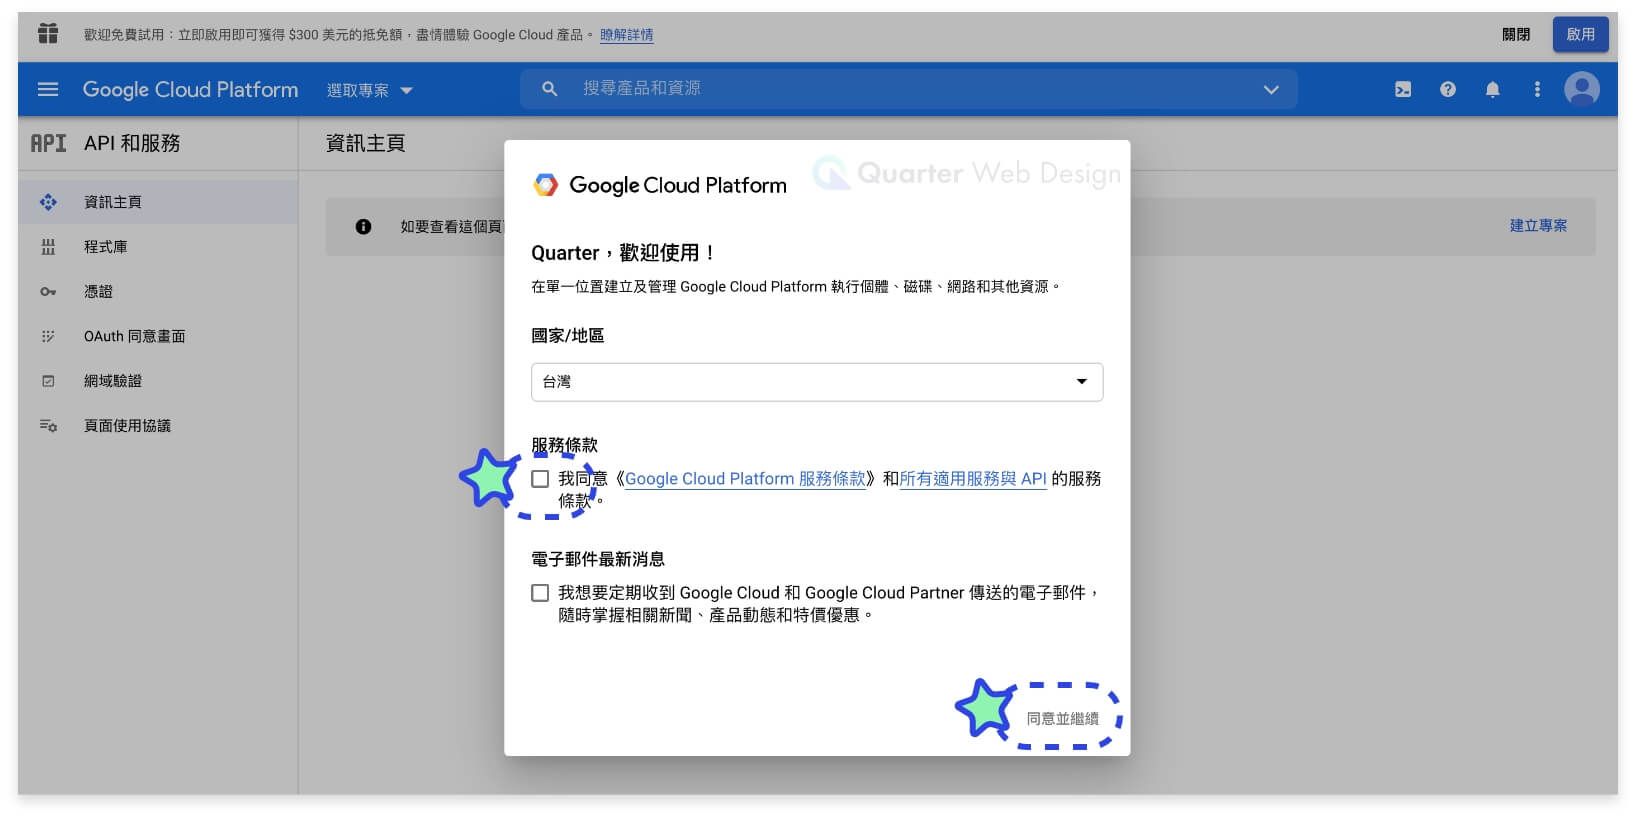
Step 1 - 進入 Google API Console https://console.developers.google.com/ 並點選同意。
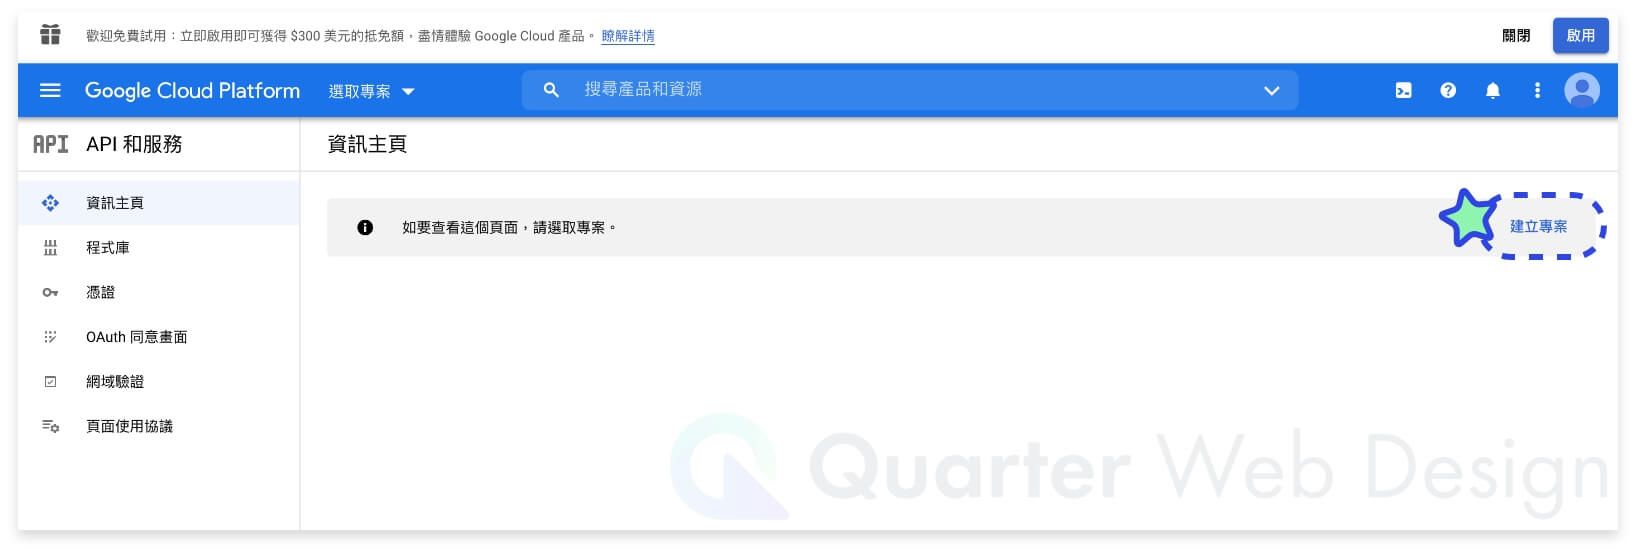
Step 2 - 點選 建立專案
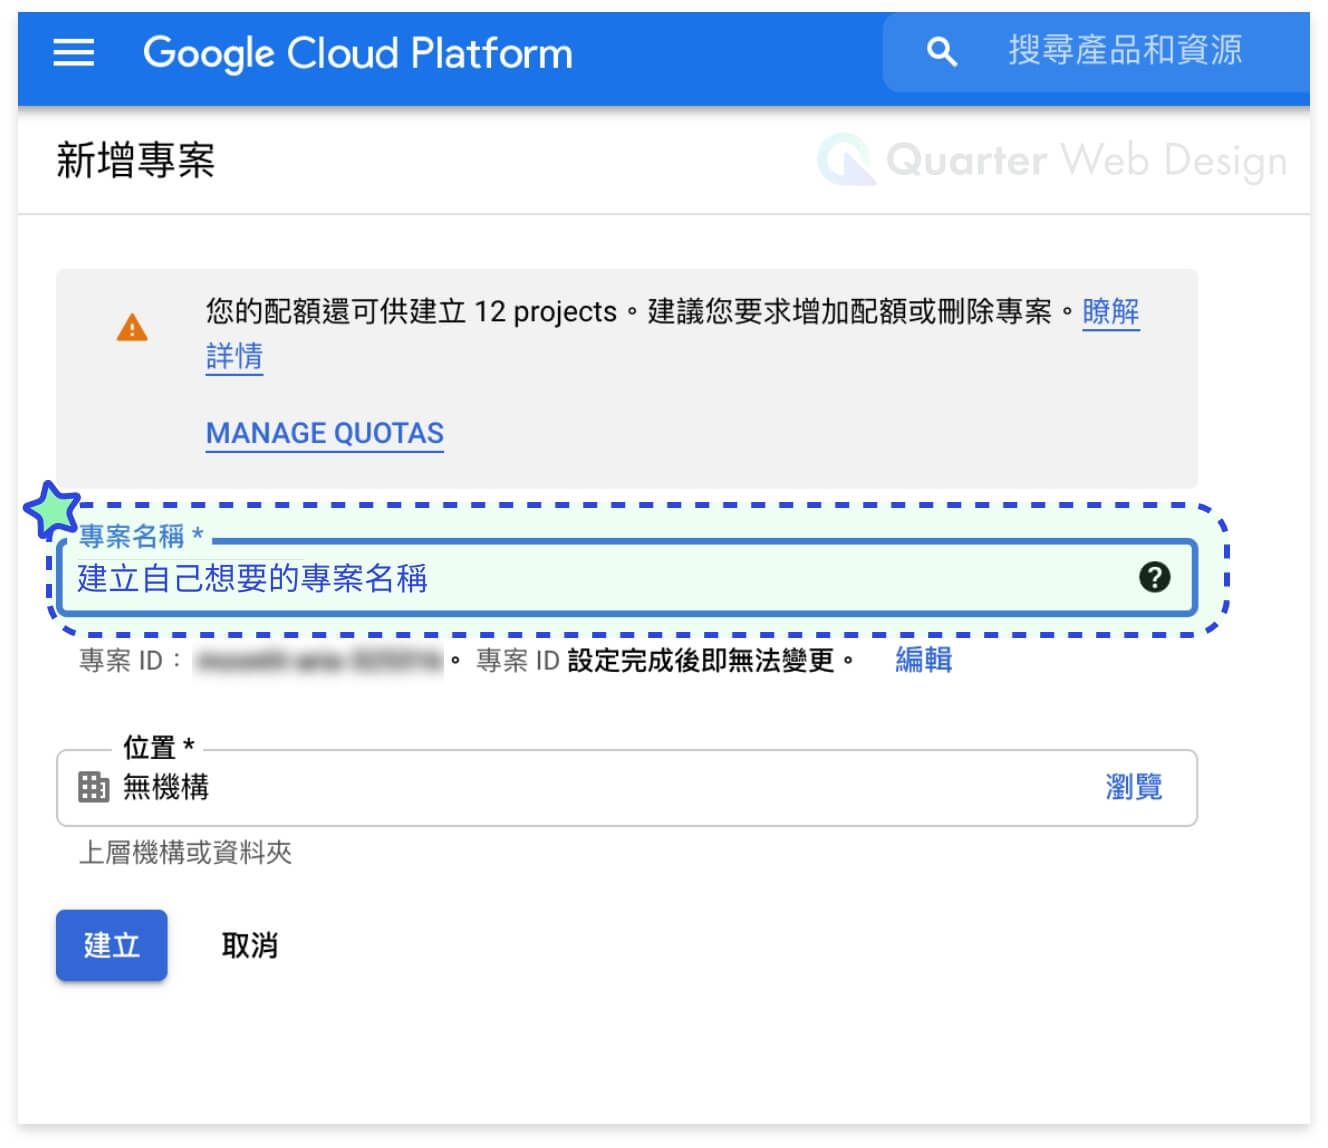
Step 3 - 填入想要的專案名稱
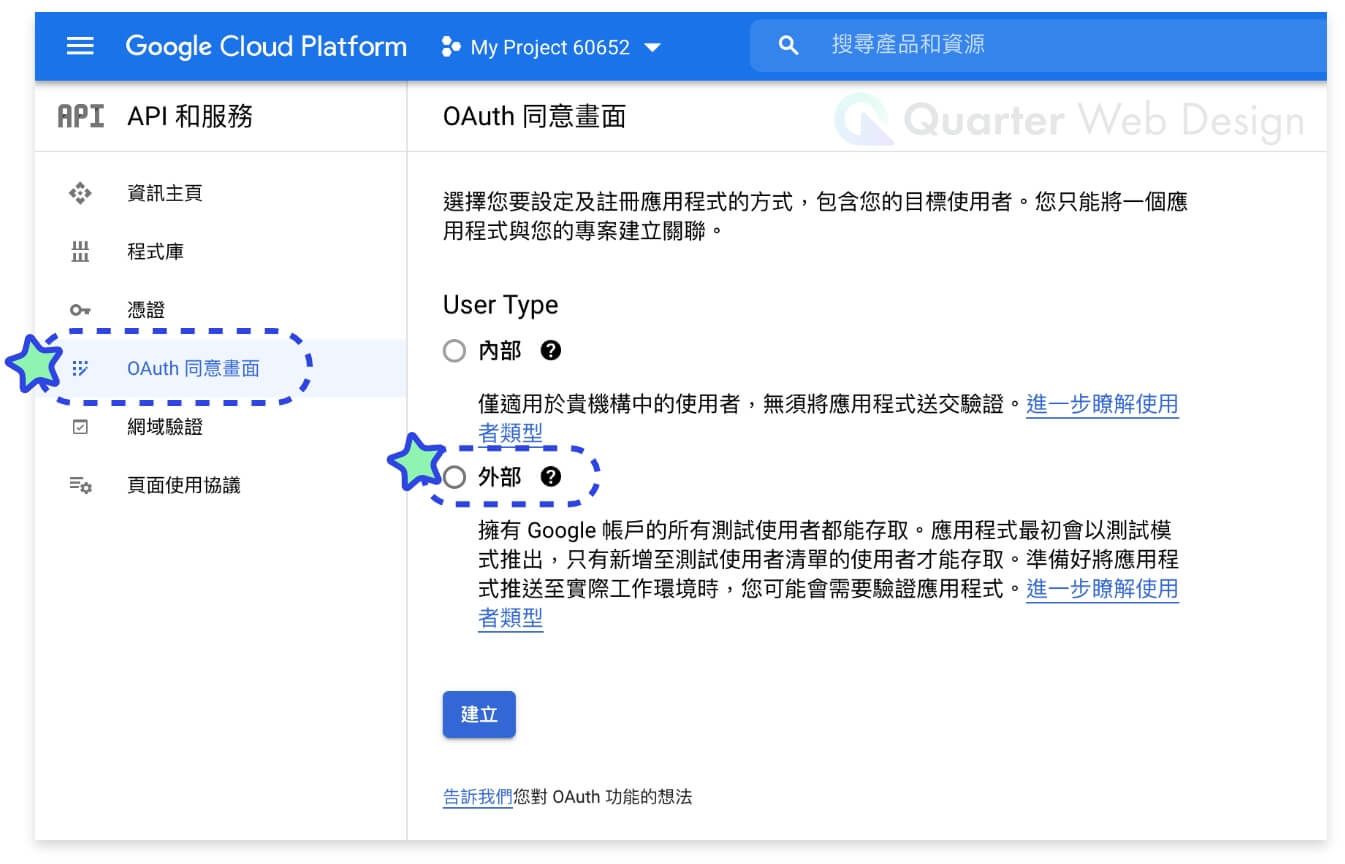
Step 4 - 點左邊的『OAuth 同意畫面』,會有兩種選擇:
內部:只提供給使用 Google Workspace 方案的帳號使用
外部:提供給任何擁有 Google 帳號的使用者使用
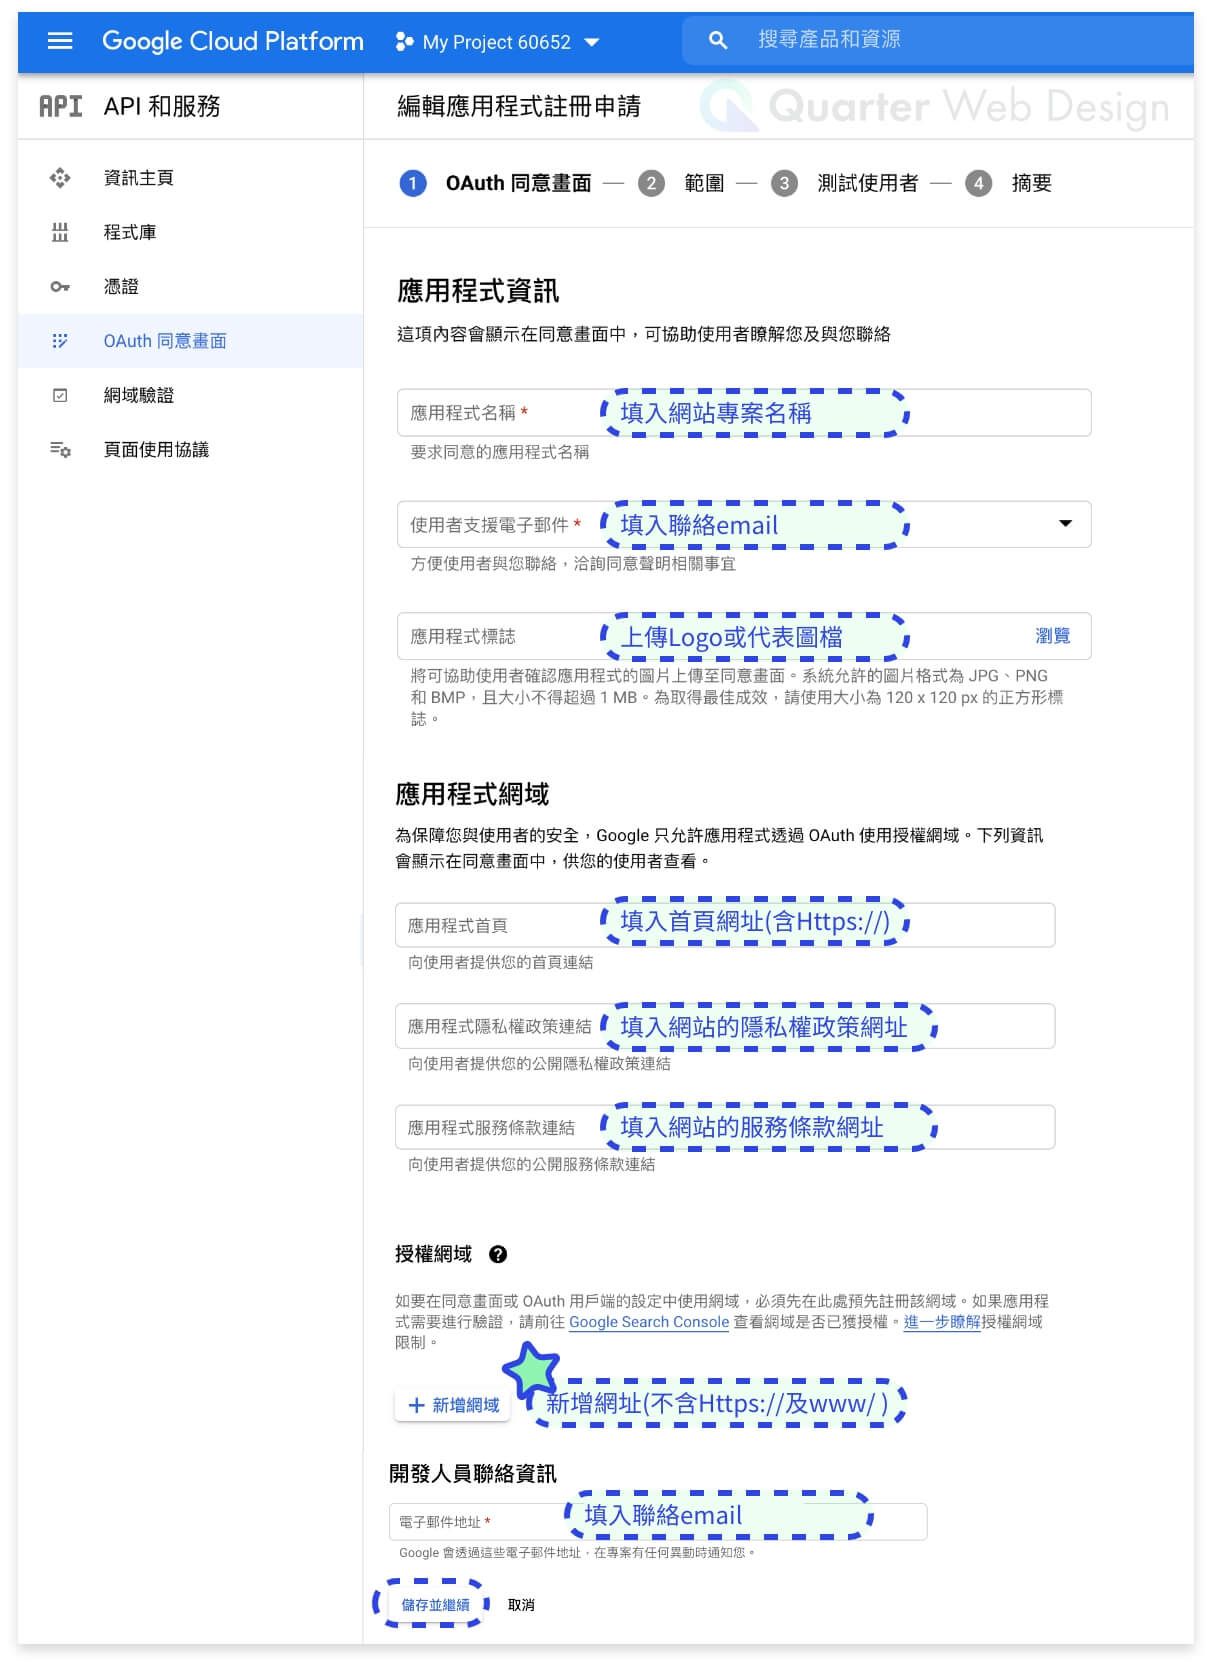
Step 5 - 填入相關的 OAuth 資料,而『已授權網域』要填寫未包含Https://跟www.的網址,填寫完畢點選『儲存並繼續』
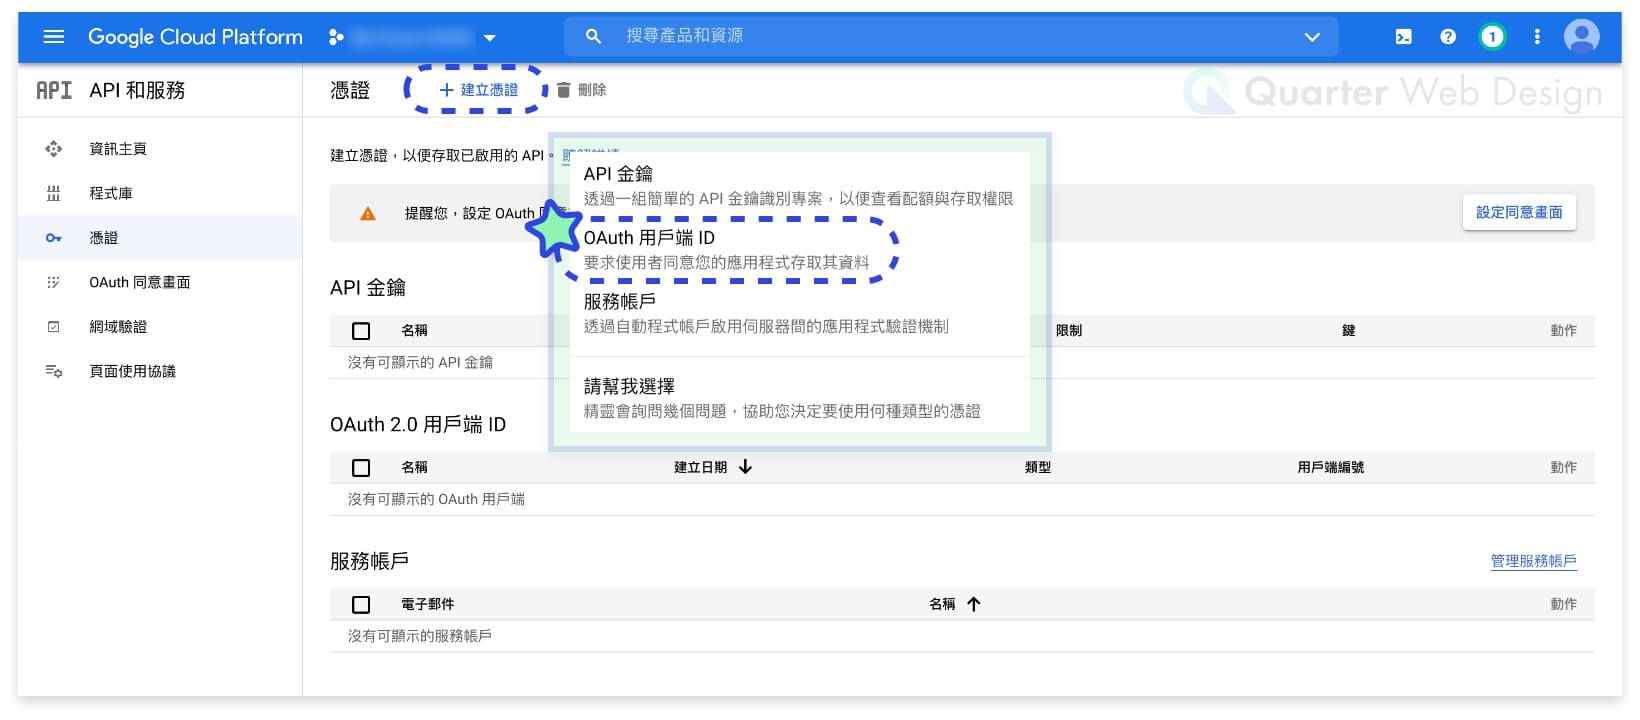
Step 6 - 點左邊的『憑證』,接著點『建立憑證』,再點選『OAuth 用戶端 ID』。
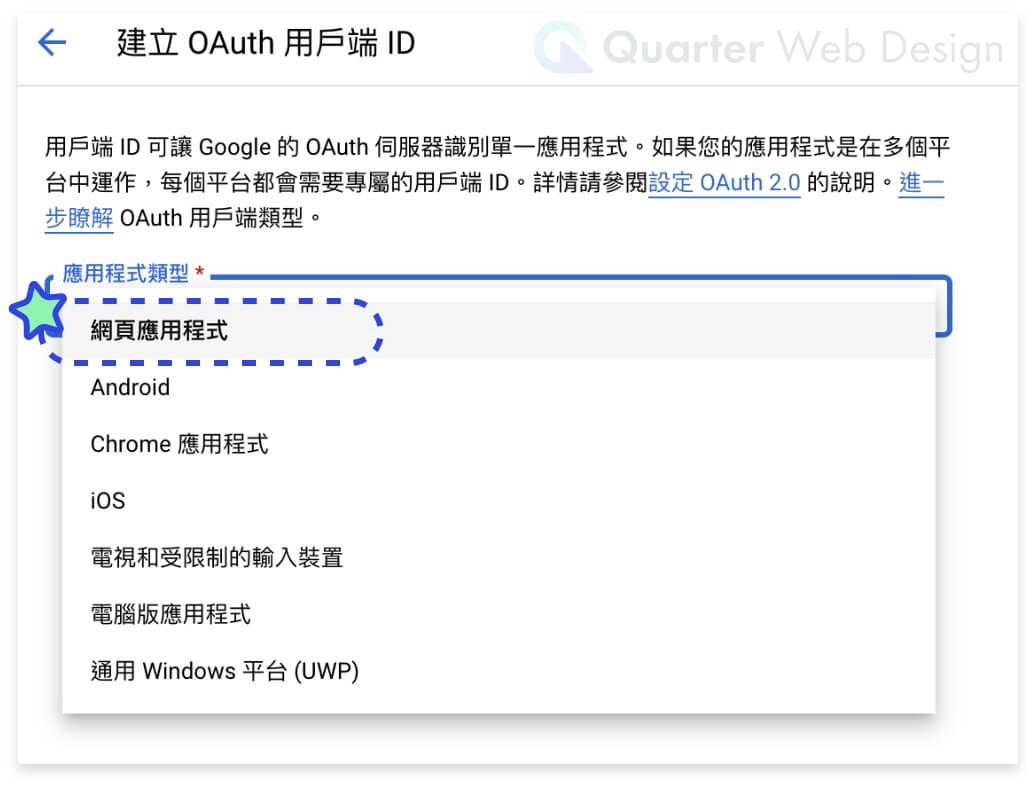
Step 7 - 應用程式類型選擇『網路應用程式』。
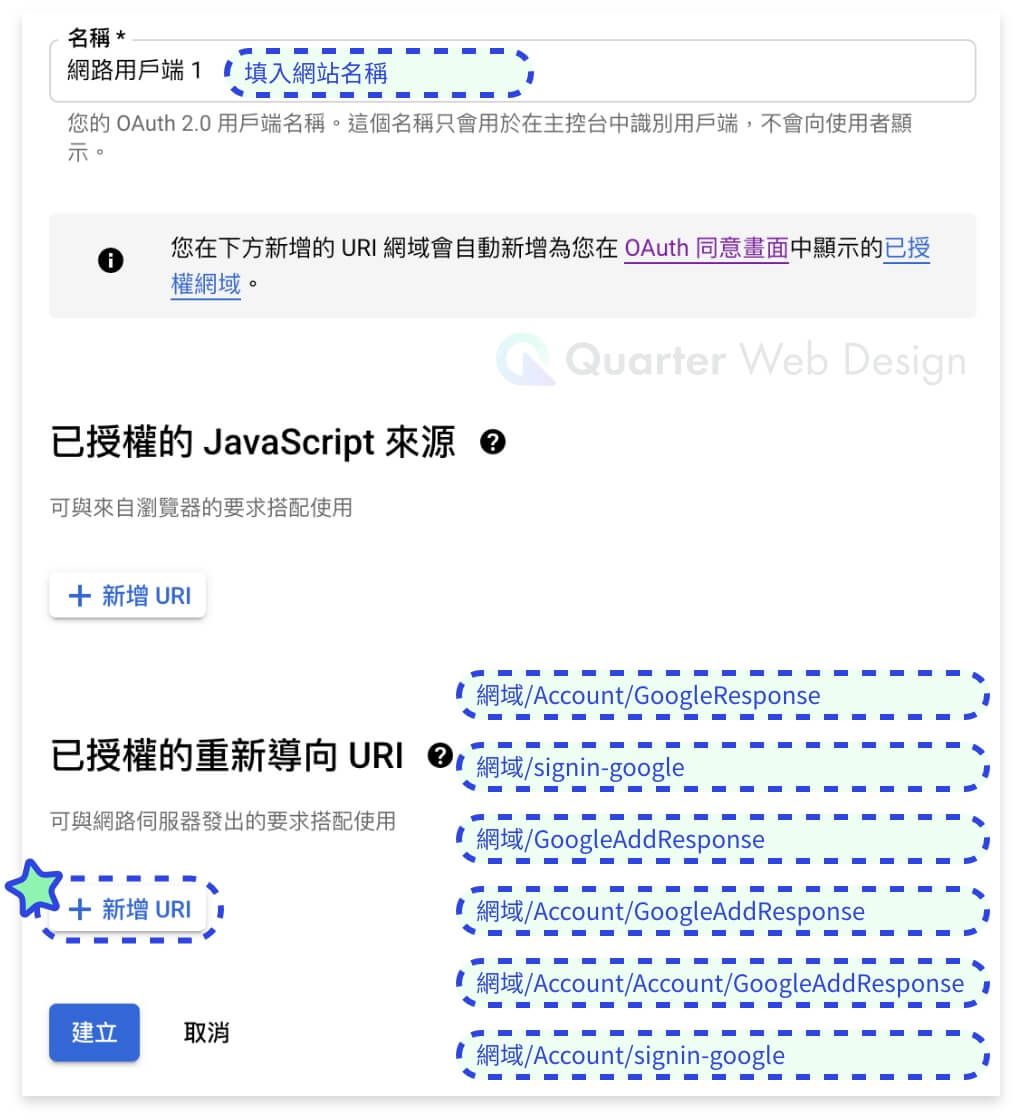
Step 8 - 名稱處填入網站名稱,並在『已授權的重新導向URI』中填入
網域
/Account/GoogleResponse
及
網域
/signin-google
及
網域
/GoogleAddResponse
及
網域
/Account/GoogleAddResponse
及
網域
/Account/Account/GoogleAddResponse
及
網域
/Account/signin-google
例如網域為 https://webdesign.quarter.com.tw/
則需填入
https://webdesign.quarter.com.tw/Account/GoogleResponse
以及
https://webdesign.quarter.com.tw/signin-google
以及
https://webdesign.quarter.com.tw/GoogleAddResponse
以及
https://webdesign.quarter.com.tw/Account/GoogleAddResponse
以及
https://webdesign.quarter.com.tw/Account/Account/GoogleAddResponse
以及
https://webdesign.quarter.com.tw/Account/signin-google
六個網址。
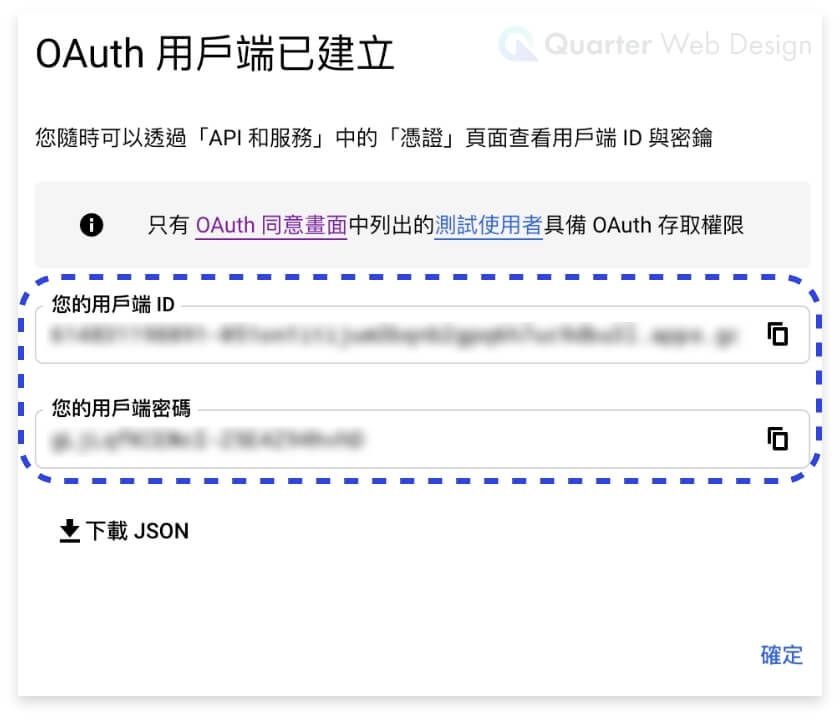
Step 9 - 完成後即會取得 用戶端 ID 以及 用戶端密碼 ,請將此資料複製 傳給您的Quarter專員。
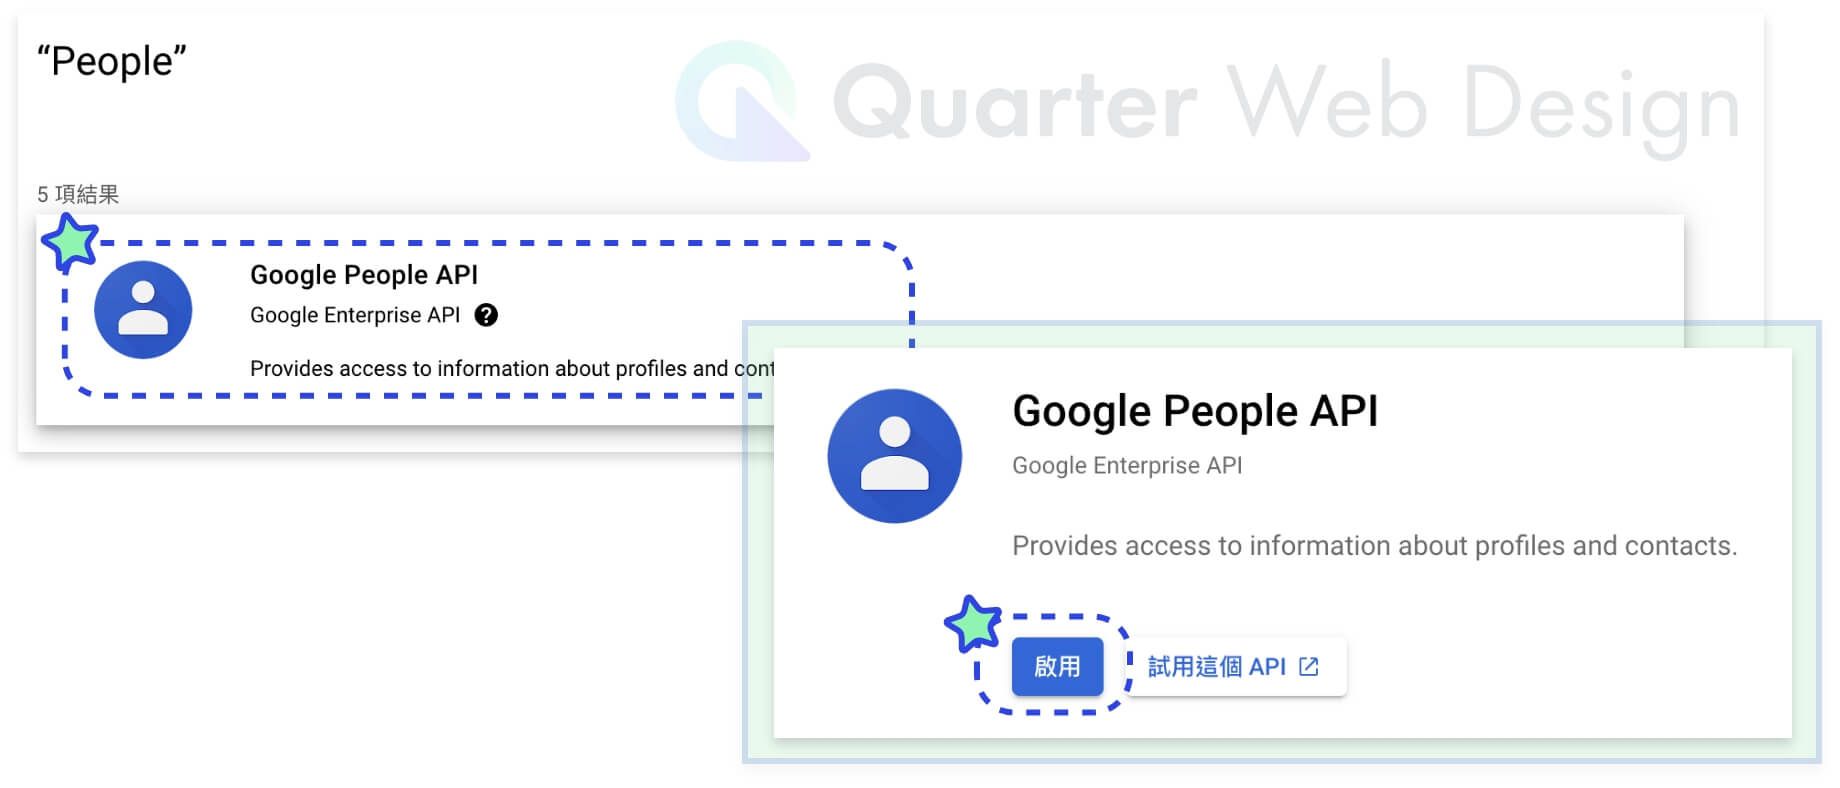
Step 10 - 接著點選左側選單中的『程式庫』,並搜尋『People』
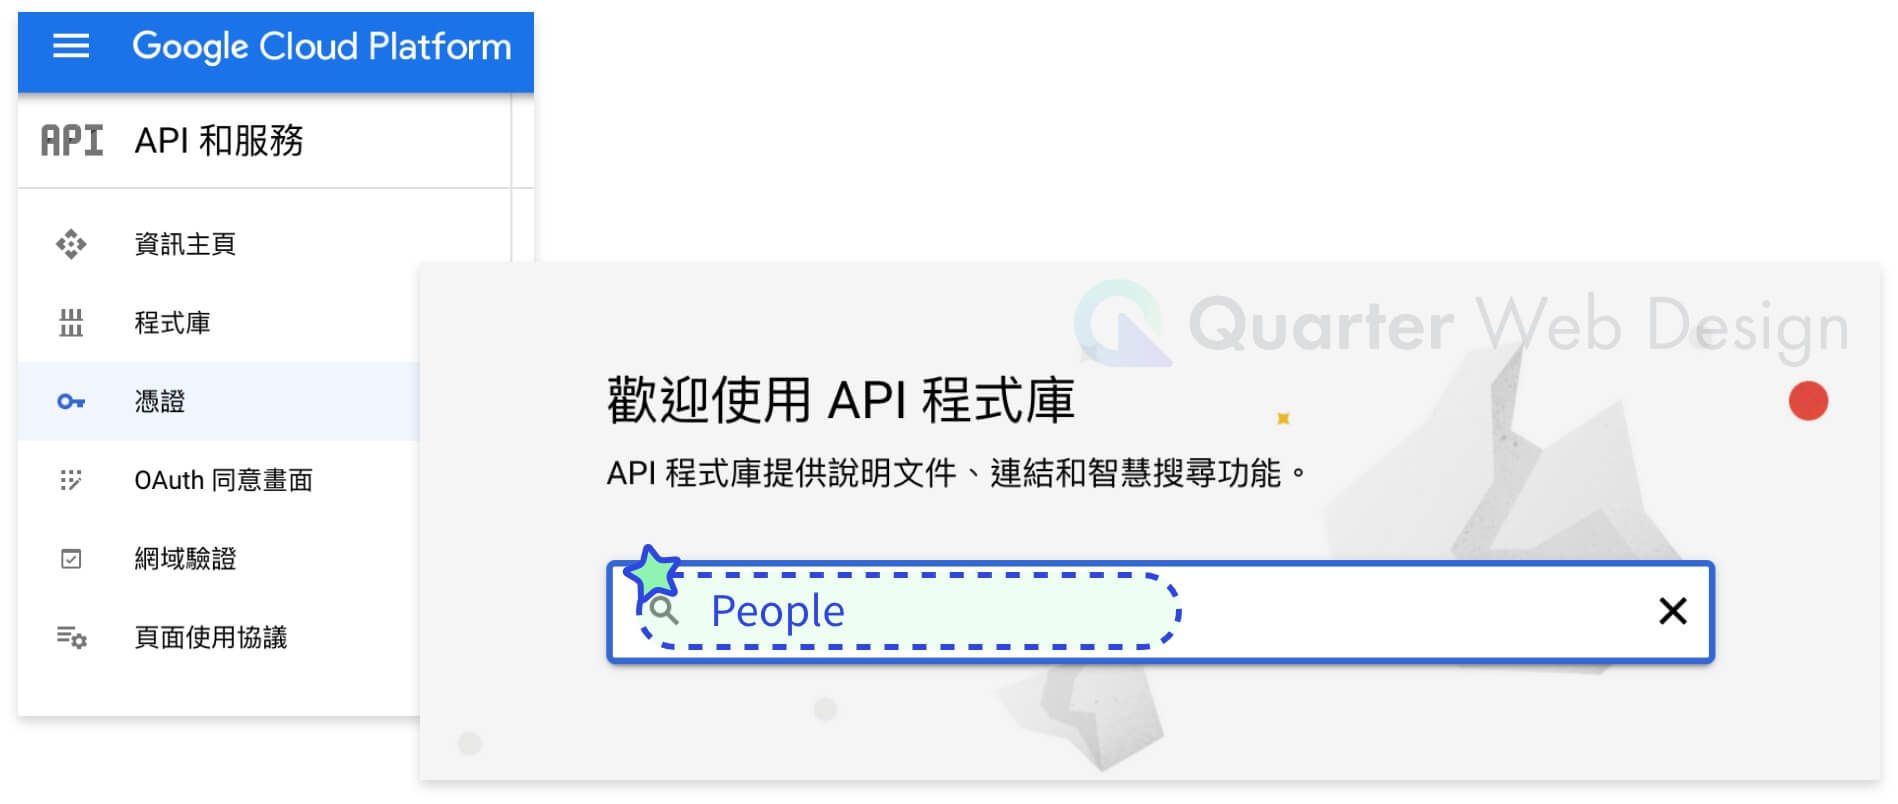
Step 11 - 搜尋到『 Google People API 』,點選『啟用』就完成囉!
